Supplying artwork for print
Getting Your Artwork Print‑Ready
Supplying artwork correctly is the key to achieving sharp, accurate and professional print results. Whether you’re designing a simple business card or a multi‑page booklet, following industry standards like adding 3mm bleed, using CMYK colour, embedding fonts and exporting the right file format ensures your design prints exactly as intended. This guide covers everything you need to know — including clear, practical steps for Canva users — so your artwork arrives truly print‑ready.
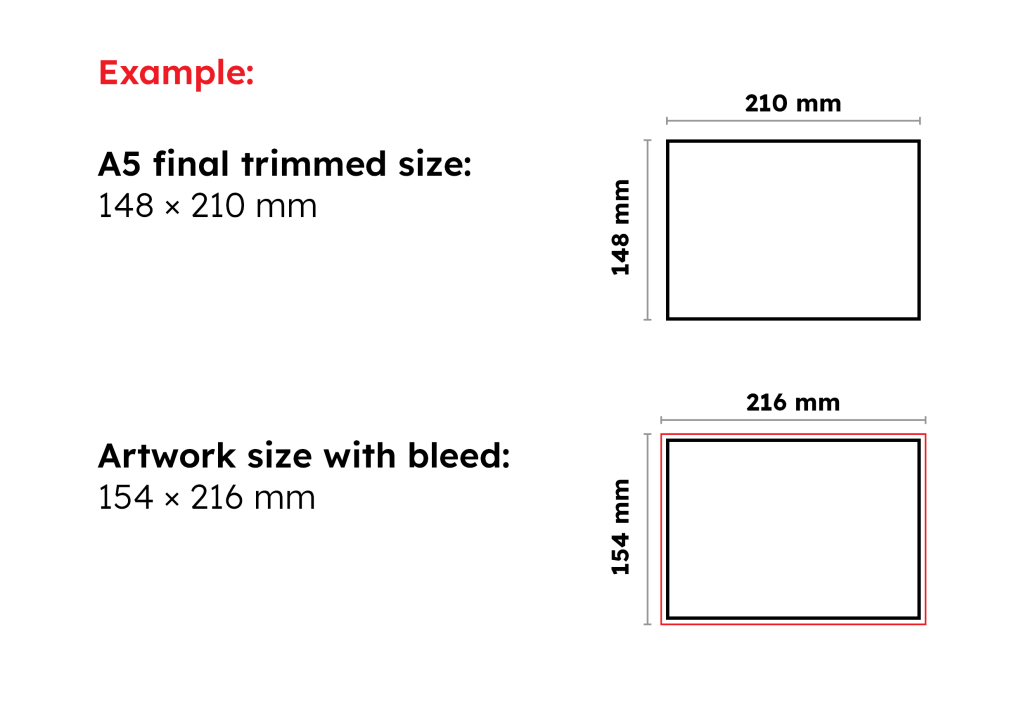
Bleed (3mm Standard)
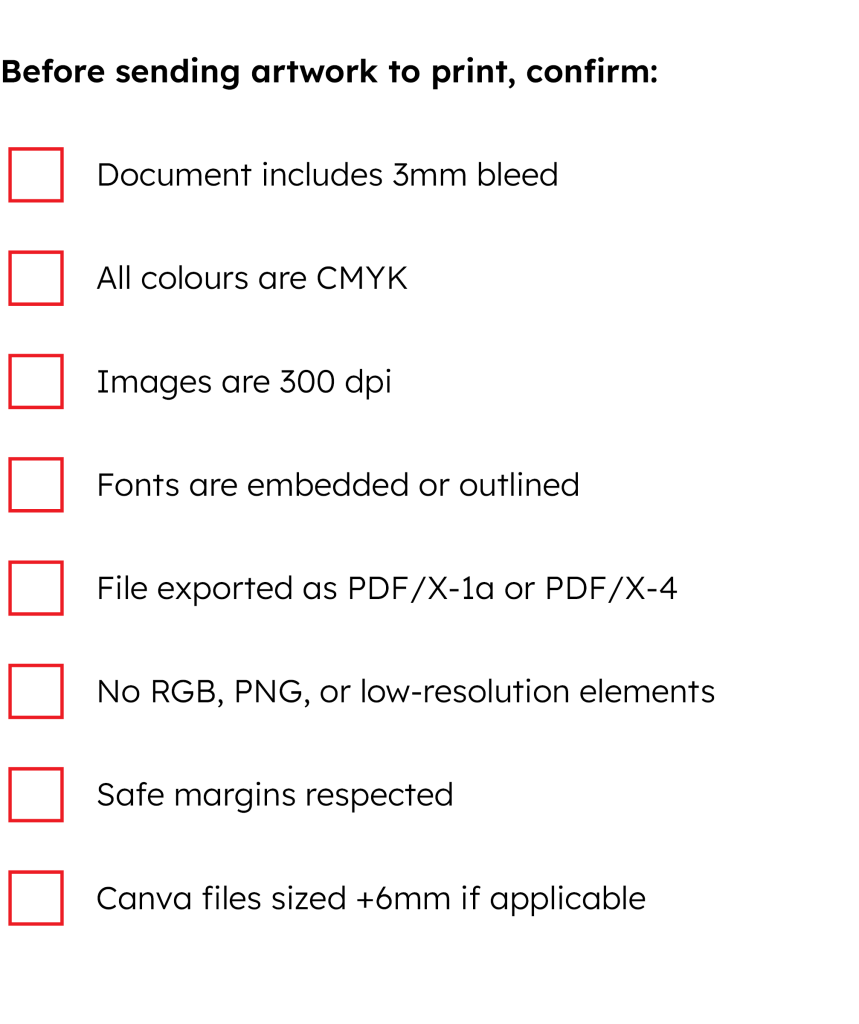
Commercial printers require 3mm bleed on all sides. Bleed is the extra area beyond the final trim size that ensures artwork prints edge-to-edge without white borders.
- Final trimmed size: the finished size of your product
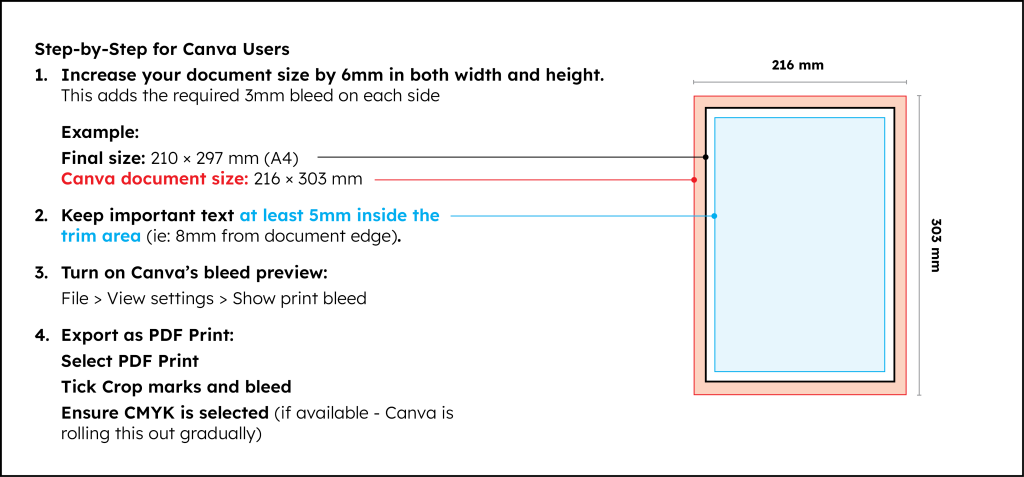
- Artwork size: trimmed size plus 3mm bleed on each edge (total +6mm to width and height)
Example:
- A5 final size: 148 × 210 mm
- Artwork size with bleed: 154 × 216 mm
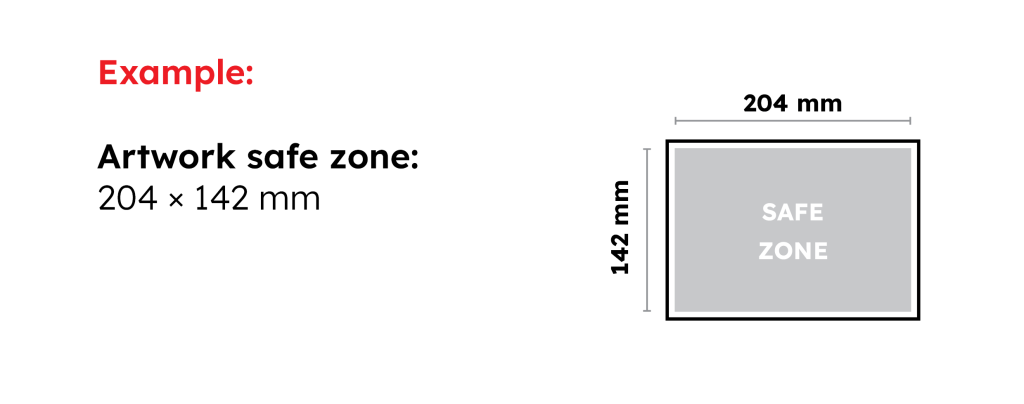
Safe Zone / Margins
Keep important text, logos, and elements at least 5mm inside the trim line to avoid accidental cutting.
CMYK Colour Mode
- All print files must be supplied in CMYK, not RGB – RGB is for screens and will shift in colour when printed
- Convert all images and artwork to CMYK before exporting
- Avoid neon or very bright RGB colours – they cannot be reproduced in print
Preferred Print-Ready Formats
- PDF/X-1a or PDF/X-4 (industry standard for commercial printing)
- High-resolution TIFF (flattened, CMYK)
- EPS (vector artwork only)
Avoid
- Low-resolution JPEGs
- PNG files (RGB only)
- Word, PowerPoint, or other non-design formats
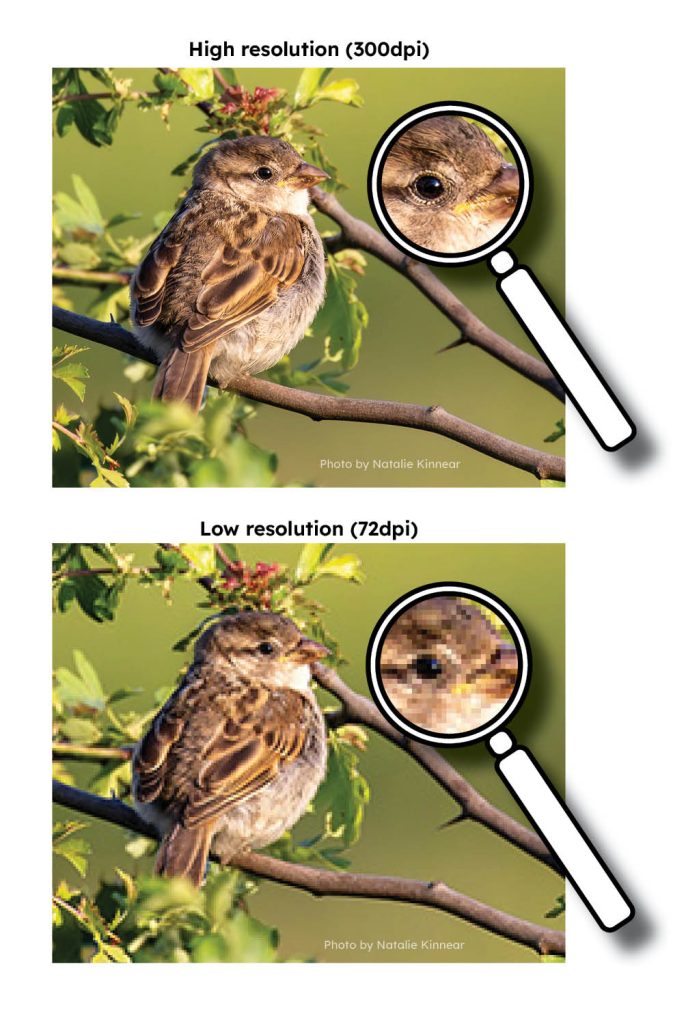
High‑resolution images are essential for professional print because they preserve sharp details which hold up under close inspection.
When an image has enough pixel density, every element—from fine text to subtle textures—reproduces crisply on press, giving the final piece a polished, trustworthy feel.
Low‑resolution images, by contrast, break down into visible pixels and blurred shapes once enlarged, which can make even well‑designed artwork look unprofessional.
Supplying high‑res files ensures your printed materials reflect your brand.
- All images must be 300 dpi at final print size
- Avoid upscaling small images – they will appear pixelated
- Vector graphics (SVG, EPS, AI, PDF) are ideal for logos and line art
- Do not use copyright or watermarked images
Embed or Outline Fonts
To prevent font substitution:
Embed fonts when exporting your PDF
or
Convert text to outlines/curves (recommended for final artwork)
Check for Overset Text
Ensure no text is hidden or cut off in text boxes.
The best way to avoid transparency problems is to ‘flatten’ layers within your PDF; you can do this in three different ways:
- Use flattening tools within the design software such as Adobe InDesign or Photoshop;
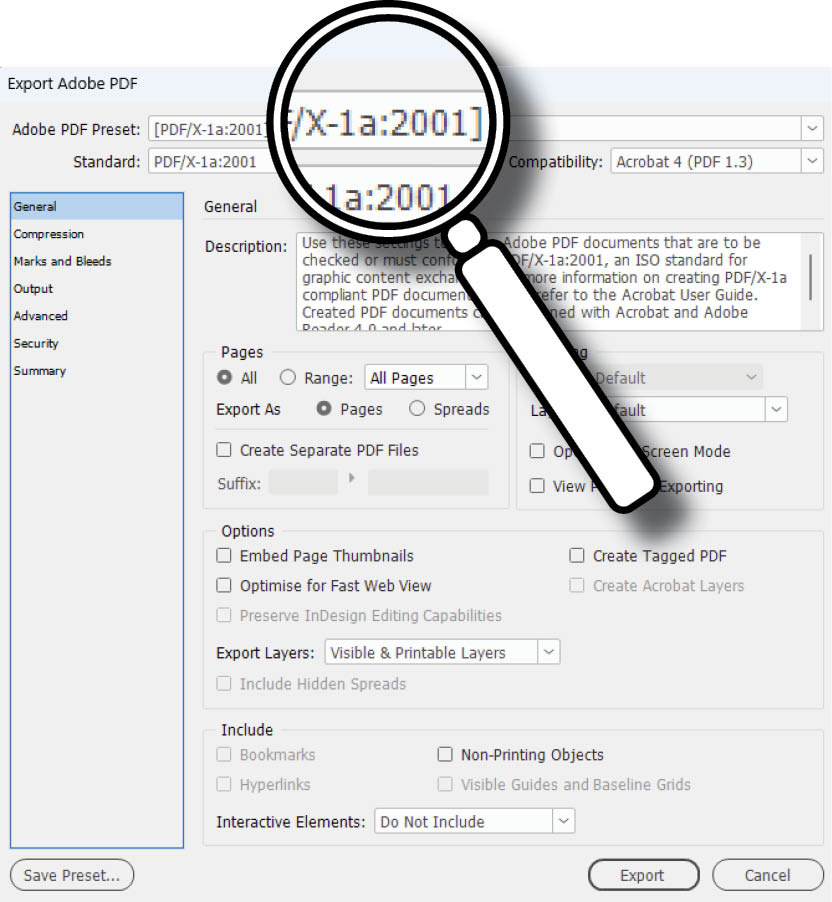
- Save in a certified format – PDF/x1a:2001 – to ensure flattening;
- Save the file into a raster format such as JPEG or PNG.
Flatten transparencies when possible
Avoid overusing drop shadows or glows unless you know how they will print
Remove unused layers and hidden objects
Canva does not automatically add bleed in the same way professional design software does.
To ensure your artwork prints correctly, follow the instructions below.
NB: Avoid using low-resolution images uploaded from the web.
Additional Best Practices
- Use rich black for large black areas (e.g., C60 M40 Y40 K100)
- Avoid borders close to the edge – they may appear uneven after trimming
- Double-check spelling and grammar before exporting
- If unsure, request a proof before full production
Summary
Providing artwork correctly ensures a smooth print process and the best possible results.
Following these guidelines – especially bleed, CMYK colour, correct file formats, and Canva adjustments – helps avoid delays and ensures your printed materials look professional.
Click here to download: